
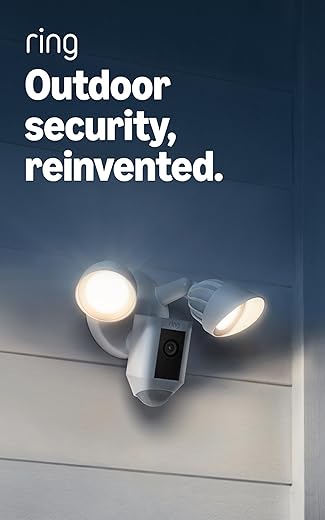
How to Integrate Your Ring Floodlight Camera with Other Smart Home Devices
In this step-by-step guide, “How to Integrate Your Ring Floodlight Camera with Other Smart Home Devices,” we will explore the process of enhancing your home security by connecting your Ring Floodlight Camera with various smart home technologies. The Ring Floodlight Camera is a powerful tool designed to bolster your home’s safety, and by integrating it with other devices, you can achieve seamless automation and improved functionality. Whether you want to set up motion-triggered lights or coordinate alerts with your smart doorbell, this guide will walk you through each essential step to create a cohesive and intelligent home security system.
Reasons I Choose Ring for My HomeKit and Alexa Smart Home Setup!
Step 1: Ensure Compatibility
Check the specifications of your smart home devices to confirm compatibility with the Ring Floodlight Camera. Look for the compatibility logos or labels on your devices, which usually indicate support for Ring products. Visit the manufacturer’s website for each device, or refer to your user manual for detailed information. Focus on essential devices, such as smart lights, smart locks, and any smart hubs you may have. Ensure that these devices can communicate with the Ring system either directly or through a compatible hub.
Examine the integration capabilities of your smart home hub, if applicable. If you use a hub for managing your devices, verify that it supports the Ring Floodlight Camera. Consult the hub’s documentation or online support resources for a list of compatible devices. If you discover that any of your existing devices are not compatible, consider researching alternative options or upgrades that work seamlessly with the Ring ecosystem. This initial step will save you time and ensure a smooth integration process.
Step 2: Set Up the Ring Floodlight Camera
Install the Ring Floodlight Camera by carefully following the manufacturer’s instructions included in the packaging. Start by selecting a suitable location for your camera, ideally high enough to cover a wide area and close to a power source. Use the provided mounting hardware to securely attach the camera to the wall or other surface. Once it is fixed in place, connect the camera to your home’s electrical system, ensuring that all connections are safe and comply with local electrical codes. After installation, turn on the power supply and check that the camera is operational.
Connect the camera to your Wi-Fi network by launching the Ring App on your smartphone. Follow the prompts to add a new device, selecting the Floodlight Camera from the list. Ensure your smartphone is connected to the same Wi-Fi network that you want the camera to use. Enter your Wi-Fi password when prompted, and wait for the app to confirm the connection. Once the camera is connected, you can customize settings and features through the Ring App, where all your integrations will be managed. Make sure to test the camera’s functionality, including motion detection and light settings, to ensure everything is working as intended.
Step 3: Open the Ring App
Launch the Ring App on your smartphone or tablet by locating the app icon on your home screen or app drawer. Tap the icon to open the app. If this is your first time using the app, allow it to load completely so that you can access all its features. Keep an eye on any prompts that may appear, as they can guide you through the initial setup process if needed.
Ensure you are logged in to your account by entering your email address and password when prompted. If you have forgotten your login details, follow the on-screen instructions to reset your password. Once logged in, you will have access to all your devices, settings, and features essential for integration. Browse through the interface to familiarize yourself with where to find your devices and adjust any necessary settings for optimal use.
Step 4: Link Devices
Open the Ring App on your smartphone or tablet and find the integration section or the ‘Works with Ring’ feature. Tap on that option to access a list of compatible smart home devices that can be linked with your Ring system. Browse through the available devices and select any that you want to integrate. Once you choose a device, follow the on-screen prompts that guide you through the linking process.
Sign into any required accounts for your smart home devices when prompted. You may need to enable specific permissions to allow the Ring App to communicate with these devices effectively. Pay attention to the instructions provided, as they may vary depending on the device you are linking. Confirm any permissions or settings to ensure a smooth integration. Once completed, your devices will be linked, allowing you to manage them from within the Ring App seamlessly.
Step 5: Customize Automation Settings
Customize the automation settings by selecting the specific devices you want to link for a seamless experience. Start by accessing your automation dashboard within the app. Choose the Floodlight Camera as your primary trigger. Set the conditions for when motion is detected—perhaps you want the smart lights to turn on automatically when someone approaches your front door. Simply select the camera, and then choose the action that follows, like “turn on lights” or “send a notification.” Tailor these options based on your preferences; for instance, you might want the camera to alert you only during certain hours, ensuring that you aren’t disturbed while you sleep.
Create more complex automations by linking your smart lock with the Floodlight Camera. When you unlock your door, you might want the camera to start recording to ensure everything is captured. Access the automation settings again, choose your smart lock as the trigger, and set the action to “start recording” on your Floodlight Camera. Consider adding additional conditions, such as sending a text alert to your phone whenever the lock is activated. This way, you not only increase security but also enjoy the peace of mind that comes from being notified about activity at your door.
Seamless Smart Home Synergy
In conclusion, integrating your Ring Floodlight Camera with other smart home devices is a fantastic way to boost your home security while enjoying the convenience of automation. By following the steps outlined in this post, you’ll create a seamless smart home ecosystem that enhances your safety and makes your life easier. So go ahead, take the plunge into smart home integration, and enjoy the peace of mind that comes with a connected security system!
Essential Equipment List

Enhance Your Setup
Step-by-Step Guide to Setting Up and Maximizing Your Ring Floodlight Camera
- Set Up the Camera: Begin by downloading the Ring app on your smartphone. Follow the in-app instructions to create an account and connect your Floodlight Camera to your Wi-Fi network
- Install the Camera: Mount the camera in a suitable location where it can capture the desired area, ensuring it’s within reach of a power source. Use the provided tools for secure installation
- Adjust Camera Settings: Once installed, use the Ring app to customize your camera settings. You can adjust motion sensitivity, set up motion zones, and enable notifications to your phone
- Test the Features: Familiarize yourself with your camera’s features, such as live view, two-way talk, and night vision. This will help you use it effectively and ensure everything is working as expected
- Explore Video Storage Options: Consider subscribing to Ring Protect plans to save and review recorded footage. This feature can be very useful for monitoring events or incidents in your area
- Enjoy using your Ring Floodlight Camera! It’s a great tool for enhancing your home security
Common Questions About Your Ring Floodlight Camera
The Ring Floodlight Camera is designed to withstand various extreme weather conditions. It has an IP54 rating, which means it’s resistant to dust and can handle light rain and splashes. However, for heavy rain, snow, or extreme temperatures, it’s crucial to ensure that the camera is mounted properly and in a sheltered location if possible. Additionally, the camera features built-in night vision and motion detection, which are effective even in challenging weather. Just remember that while it can handle a range of conditions, providing it with some protection from the elements can help ensure optimal performance over time.
Read also: How to Extend the Battery Life of Your Baby Monitor


About the Author: Oliver James


news via inbox
Stay updated with the latest tips and offers. Subscribe to our newsletter today!


For anyone interested in the Ring Floodlight Camera, I suggest getting the Ring Chime too. It notifies you when someone is at your door, and it works great with the camera!
Hey, does anyone have specific recommendations for smart lights that work well with the Ring Floodlight Camera? I wanna make sure I get something that integrates smoothly!
I feel like the integration process is a bit too complicated. Why is it that some other smart cameras are so much easier to hook up? Anyone else feel this way?
It can be a bit tricky sometimes! Each brand has its own setup process, but once you get the hang of it, Ring offers a lot of great features. It’s all about finding the right balance between security and ease of use.
Does the camera allow for customization of motion sensitivity? I feel like it’s picking up too much activity from passing cars.
Yes, you can customize the motion sensitivity in the app! Just go to ‘Motion Settings’ and adjust the sliders to reduce sensitivity. This should help with false alerts.
I’m having trouble linking my Ring Floodlight Camera with my Google Nest Hub. It just keeps saying ‘connection failed’ during Step 4. Anyone else face this issue? What did you do to fix it?
Sorry to hear you’re having trouble! Make sure both devices are on the same Wi-Fi network and try restarting your devices. If that doesn’t work, you might want to check for any updates in the Ring app.
Could you share some advanced tips for customizing the automation settings? I want to set up my camera to only alert me during certain times of the day.
Absolutely! You can set up schedules in the Ring app under the ‘Motion Settings’ section. This allows you to customize alerts based on time, so you won’t be disturbed outside your preferred hours.
I’d love to see a follow-up article on integrating the Ring Floodlight Camera with smart doorbells like the Ring Video Doorbell Pro. That could be super useful!
Thanks for the suggestion! Integrating with smart doorbells is a great idea, and we’ll definitely consider it for future articles.
Great question! The Philips Hue White and Color Ambiance bulbs are a popular choice for integration with Ring products. They offer a lot of customization and work seamlessly together.
I actually adapted these steps a bit! I used my Ring Floodlight Camera with a SmartThings hub instead of the Ring app for automations. It worked really well, and I like the interface better!
That’s a clever adaptation! Using SmartThings can give you more flexibility with automations. Thanks for sharing your experience!
I set up my Ring Floodlight Camera with my Philips Hue lights to create a cool security setup. Whenever the camera detects motion, it turns on the lights outside. It’s like a mini disco party for intruders! 😂
I followed all the steps but couldn’t get the camera to connect to my smart home hub. Should I try resetting the camera, or is there something else I should check?