

How to install Vivint Smart Home Security System?
In today’s world, ensuring the safety of your home is more important than ever, and the Vivint Smart Home Security System offers a comprehensive solution with its state-of-the-art features. This guide is designed to walk you through the installation process of your Vivint system, making it simple and straightforward. With advanced security capabilities, 24/7 monitoring, and seamless smart home integration, you’ll be on your way to creating a secure and connected living environment in no time. Follow these steps to set up your system efficiently and enhance your home’s protection.

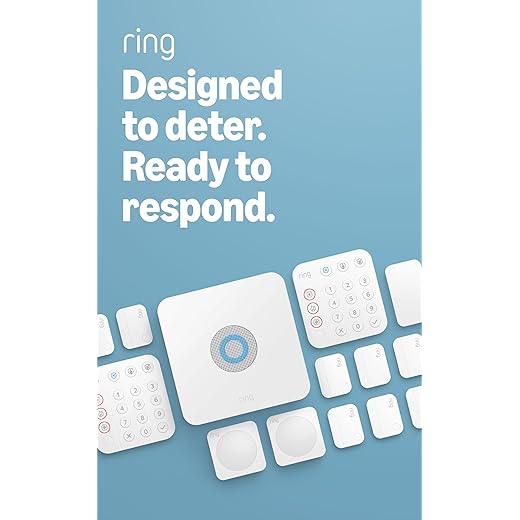

Installation Guide for Vivint Smart Home and Security Systems
Gather Necessary Tools and Equipment
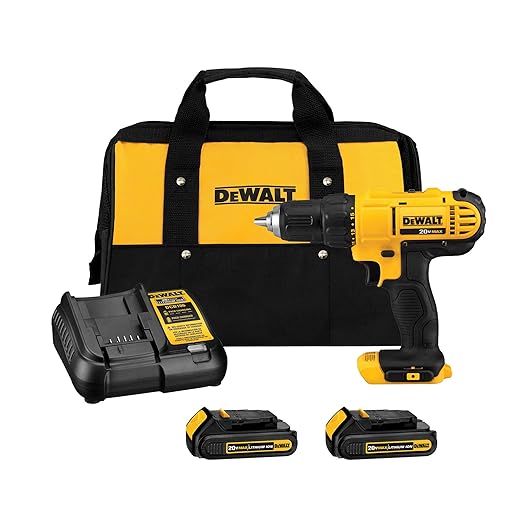
Gather all necessary tools before diving into the installation process. Ensure you have a screwdriver and a drill handy, as these will be essential for securely mounting the equipment. Open your Vivint kit and lay out the control panel, door/window sensors, and any cameras you plan to install. Check that you have the included mounting hardware and batteries as well, so you won’t have to make any last-minute trips to the store. This preparation will streamline your setup and make the entire process smoother.
Choose Installation Locations
- Assess the layout of your home or office to determine the most effective locations for your control panel and security devices.
- Place the control panel in a central location that is easily accessible, allowing for quick access in case of an emergency.
- Ensure that sensors are installed on all entry points, such as doors and windows, to maximize security coverage.
- Test the placement of sensors to confirm they are within the optimal range for detecting movement or unauthorized access.
- Consider visibility when positioning cameras; ensure they cover vulnerable areas without obstruction.
Mount the Control Panel
Drill pilot holes into the wall where you want to mount the control panel. Insert screws into the pilot holes, ensuring they are sturdy and secure. Align the control panel with the screws and gently press it against the wall. Verify that the location has a strong Wi-Fi signal by using a smartphone or other device, then adjust the position if necessary.
Install Door and Window Sensors
Attach the door and window sensors according to the manufacturer’s instructions. Align the sensors with their corresponding magnetic contacts, ensuring that they fit snugly when the doors or windows are closed. Secure the sensors firmly in place using the provided adhesive or screws, keeping in mind the recommended placement height. Test the alignment by closing the doors or windows and checking for a secure connection between the sensors and contacts.
Set Up Indoor and Outdoor Cameras
Position indoor cameras in high-traffic areas, such as the living room or entryway, where they can capture the most activity. Mount outdoor cameras at corners of your home or near entry points like doors and garages to maximize their coverage. Ensure each camera has a clear view by avoiding obstructions like plants or furniture that could block the lens. Check your Wi-Fi signal strength at each location to confirm they remain connected; if the signal is weak, consider moving the camera or using a Wi-Fi extender to enhance connectivity.
Connect Devices to the Control Panel
Open the Vivint app and navigate to the device connection section. Scan the QR code located on the back or bottom of each device, or enter the device ID manually if the code is not available. Watch for confirmation messages on the app indicating successful connections. For instance, if you’re connecting a doorbell camera, ensure you follow the prompts to align the camera’s QR code with your smartphone camera for seamless pairing.
Configure Your System Settings
Access the control panel to configure your security settings effectively.
- Select the “Security Settings” option to begin.
- Set up your security codes by entering a unique code that only you will remember.
- Adjust your notification preferences by choosing how and when you want to receive alerts—whether via email, SMS, or app notifications.
- Schedule monitoring times according to your needs, ensuring your system is actively monitored during the hours you want it most vigilant.
Test All Security Devices
- Perform a thorough test of each security device in your home.
- Open and close all doors and windows equipped with sensors, ensuring that the alarms trigger correctly when they are opened. For example, if you have a door sensor, open the door and listen for the alarm to activate.
- Monitor camera feeds by checking the live stream to confirm that each camera is functioning and has a clear view of its designated area. Make sure to adjust the angles if necessary.
- Check the alarm functionality by activating the alarm system and verifying that it sounds as expected. For instance, set off the alarm while standing nearby to ensure you can hear it clearly.
- Test motion detectors by walking in front of them to see if they detect your movement and trigger the alert.
Final Setup and App Integration
Download the Vivint app from the App Store or Google Play on your smartphone. Log in using your account credentials to access your security system. Once logged in, follow the on-screen prompts to integrate your security devices for seamless remote monitoring and management. Ensure that your smartphone is connected to the internet for optimal functionality.
Final Steps to Installation
In conclusion, installing your Vivint Smart Home Security System is a straightforward process that can significantly boost your home’s safety. By following the steps outlined in this post, you’ll be well on your way to enjoying peace of mind knowing that your home is secure. Remember to regularly check your system and update settings as necessary to keep everything running smoothly. Happy securing!
Essential Equipment List
Essential Installation Insights


About the Author: Oliver James


news via inbox
Stay updated with the latest tips and offers. Subscribe to our newsletter today!


I followed the guide, but I ran into some trouble with the door sensors. They won’t connect to the control panel, and I’ve tried resetting them a couple of times. Any troubleshooting advice would be awesome!
Sorry to hear you’re having trouble! Make sure the sensors are within range of the control panel and check the battery levels. If they’re still not connecting, try to power cycle the control panel. If that doesn’t work, reach out to Vivint support for further assistance. You’ve got this!
Just wanted to share my experience! I installed the Vivint Smart Home Security System last weekend using this guide, and it was surprisingly easy. I mounted everything in under two hours, and now I feel so much safer! The indoor camera works great and gives me peace of mind. Thanks for putting this together!
That’s fantastic to hear! We’re thrilled that the guide helped you get everything set up smoothly. Enjoy your new security system, and don’t hesitate to reach out if you have any more questions or need further assistance. Stay safe!
Hey, this guide was super helpful for the basic setup! But do you have any advanced tips for integrating smart home devices like Philips Hue or smart locks with the Vivint system? Would love to maximize my security setup!
Thanks for your feedback! For advanced tips, look into setting up automation routines in the Vivint app. You can create scenarios where your lights turn on when the security system is armed or disarmed. Also, consider using geofencing to automatically adjust settings when you leave or return home. Happy smart homing!