

How to install outdoor security lights?
Did you know that homes without outdoor lighting are three times more likely to be broken into? This startling statistic underscores the importance of installing outdoor security lights to safeguard your property. This step-by-step guide is designed to equip homeowners with the knowledge and confidence needed to install these essential lights effectively. By following our straightforward instructions, you’ll not only improve the visibility around your home but also create a formidable barrier against potential intruders, ultimately enhancing your peace of mind and security.


Guide to Installing an Outdoor Motion Sensor Security Light
Gather Your Materials and Tools
Gather all necessary materials before starting your installation. Collect outdoor security lights that suit your needs and the specific area you plan to illuminate. Choose fixtures that are weatherproof to withstand outdoor conditions. Ensure you have the appropriate mounting hardware, which might include screws, anchors, or brackets. Assemble a drill and a screwdriver for securing the lights in place. Don’t forget wire strippers; these will be essential for connecting the electrical wires. Lastly, prioritize your safety by putting together gloves and goggles to protect yourself during the installation process.
Lay everything out in a designated workspace to keep your project organized. Check that you have all components, including the light bulbs that fit your fixtures. For instance, if you are using LED lights, verify that they are compatible with the selected security lights. If your lights require specific wiring connectors, gather those too. Keep a small toolbox nearby with essentials like pliers and a voltage tester, which can help ensure that the electrical connections are secure and safe. By preparing your materials ahead of time, you’ll streamline the installation process and reduce the chances of interruptions or forgetting vital components.
Choose the Right Location
Choose strategic locations for your outdoor security lights. Identify key areas around your property that require illumination, such as near entrances, driveways, or any dark corners that may be inviting for intruders. Ensure that the lights are positioned to provide maximum coverage and visibility, making it difficult for anyone to approach unnoticed. Consider the following points:
- Position lights near front and back doors to enhance security during entry and exit.
- Install lights along walkways and driveways to illuminate paths, making it safer for you and guests.
- Highlight any dark areas like shrubs, fences, or storage units to deter potential trespassers.
Evaluate the height and angle of your lights. Aim for a height that discourages tampering, typically around 8 to 10 feet, while ensuring they are angled to cover wide areas without creating blind spots. Check the light’s beam spread to make sure it encompasses the desired coverage area. Walk around your property after dark to identify any poorly lit spots that need attention, and adjust the positions accordingly until you feel confident that all vulnerable areas are sufficiently lit.
Turn Off Power Supply
Turn off the power supply at the circuit breaker for the area where you are installing the lights. Locate your circuit breaker panel, which is typically found in a basement, garage, or utility room. Identify the switch that controls the specific circuit for the lights you will be working on. Flip that switch to the “off” position, ensuring that the power is completely cut off. If you’re unsure which breaker to flip, consider turning off the main power supply for added safety.
Test the power is off using a voltage tester. Take the tester and carefully touch the probes to the wires or fixtures where you plan to install the lights. If the tester lights up or beeps, the power is still on, so return to the circuit breaker and double-check your switch. Once you confirm that the power is off and the tester shows no voltage, you can safely proceed with your installation without any risk of electric shock. Always prioritize safety before starting any electrical work!
Install the Mounting Bracket
Follow the manufacturer’s instructions carefully when installing the mounting bracket for your security lights. Gather all the necessary tools, including a drill, level, and appropriate screws. Start by marking the locations for the holes on the wall or surface where you’ll secure the bracket. Ensure the marks are level to prevent the lights from hanging unevenly. Use a pencil to make clear, visible marks. Once you have your marks, drill pilot holes to make it easier to drive in the screws later.
Position the mounting bracket against the wall, aligning it with the pilot holes you just created. Use the level to check that the bracket is straight before securing it. Fasten the screws into the pilot holes, ensuring they are snug and secure, but be careful not to overtighten, as this could damage the wall or bracket. Double-check that the bracket is firmly attached and can support the weight of the lights before proceeding to the next steps in your installation process.
Connect Wires and Attach Lights
Carefully connect the wires from your security lights to the existing electrical system. Start by turning off the power at the circuit breaker to ensure safety. Follow the wiring diagram provided by the manufacturer closely; this diagram is your guide for matching colors and connections. For instance, typically, black wires connect to black, white to white, and green or bare wires go to the ground. Use wire nuts to secure the connections, twisting them tightly to prevent any exposed wire. Once secured, ensure that you tuck the wires neatly back into the junction box to avoid any hazards.
Attach the lights to the mounting bracket after the wiring is complete. Position the light fixtures over the mounting bracket and align them according to the manufacturer’s instructions. Secure the lights using the provided screws, ensuring they are tight enough to prevent any movement but not so tight that they damage the fixture. For example, if your lights have adjustable heads, make sure they are positioned before fully tightening. Finally, double-check all connections and the fixture’s stability before turning the power back on. This will ensure that everything is installed correctly and functions as intended.
Final Thoughts on Installation
In conclusion, installing outdoor security lights is a straightforward process that can significantly boost your home’s safety and security. By following the steps outlined in this post, you’ll not only ensure proper installation but also enjoy the benefits of enhanced visibility and peace of mind. So, once you’ve completed your installation and made any necessary adjustments, you can rest easy knowing that your home is better protected. Happy lighting!
Essential Equipment Needed
Maximize Your Setup
Step-by-Step Guide to Effectively Install Your Security System
- Choose the Right System: Research different types of security systems (wired, wireless, DIY, professional installation) and pick one that fits your needs and budget. I found that considering factors like home size and the level of security I wanted really helped narrow down my options
- Read the Manual: Once I had my system, I made sure to read the installation manual thoroughly. It usually contains step-by-step instructions that are super helpful, especially for a first-timer like me
- Gather Tools and Equipment: Before diving into the installation, I gathered all necessary tools (like a screwdriver, drill, and ladder) and equipment that came with the system. Being organized made the whole process smoother!
- Plan Your Layout: I took some time to plan where I wanted to place the cameras and sensors. I found it helpful to visualize the coverage areas and ensure they were positioned for maximum security
- Test the System: After installation, I made sure to test all components to ensure they were working correctly. I set off the alarms, checked the camera feeds, and made sure everything was connected to my phone app. It was reassuring to know my system was up and running!
- I hope this helps you get started with your security system installation! Feel free to ask if you have any questions!
Ensuring Your Safety: Security System Installation FAQs
Absolutely, you can install a security system yourself, and many people do! There are a variety of DIY security systems on the market that come with user-friendly instructions and can be set up without professional help. These systems often include features like cameras, alarms, and smart home integration, making them accessible for the average person.
However, there are some things to consider before deciding. If you’re not comfortable with technology or have a complex property layout, hiring a professional might be a better option. Professionals can provide tailored solutions, ensure proper installation, and often offer monitoring services.
Ultimately, it depends on your comfort level, budget, and specific security needs. If you choose to go the DIY route, just make sure to do thorough research and follow the installation guidelines carefully!
Also Read: Understanding Outdoor Security Light Ratings


About the Author: Oliver James


news via inbox
Stay updated with the latest tips and offers. Subscribe to our newsletter today!



I had a hard time deciding where to place my lights. Any tips on choosing the right location? I want to cover my driveway, but I don’t want it to be an eyesore.
When choosing a location, try to pick spots that are both functional and aesthetically pleasing. You could mount them on either side of your garage or near pathway entrances for a good balance of visibility and design. Hope that helps!
Thanks for the question! For maximum effectiveness, consider installing the lights at a height of around 8-10 feet and angling them downwards for better coverage. Also, make sure to take into account any nearby trees or structures that might block the light. Happy lighting!
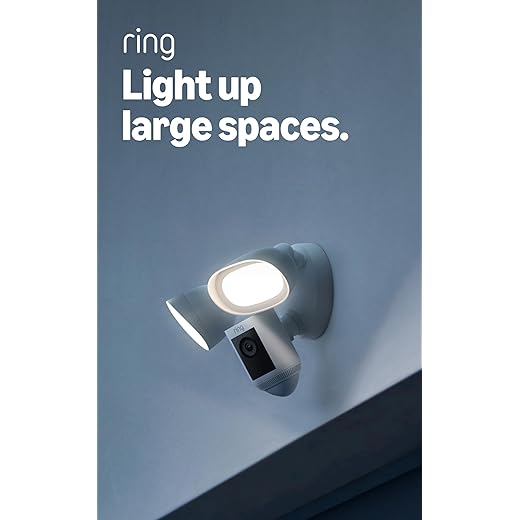
I’m thinking of using the Ring Floodlight Cam for the installation. Would that be a good choice? Any specific features I should look for?
Could you cover how to properly maintain outdoor security lights in a future article? I want to make sure they last long without any issues.
That’s a great suggestion! I’ll definitely consider writing about maintenance tips for outdoor security lights. Keeping them clean and checking for loose connections can make a big difference!
I just finished installing the lights using your guide, and they look amazing! I went with the Hyperikon LED Security Light, and it’s super bright. Thanks for the easy-to-follow steps!
Hey, great guide! Do you have any advanced tips for positioning the lights for maximum effectiveness? I want to make sure I cover all the blind spots! Thanks!
Do you think using solar-powered lights is a good option for outdoor security? Just wondering if they’re as effective as wired ones.
Solar-powered lights can be a great option for outdoor security, especially if you want to avoid wiring. Just make sure they get enough sunlight during the day to charge properly. Some models, like the Ring Solar Floodlight, have excellent reviews!
Can you suggest related topics like how to integrate these lights with smart home systems? I’d love to automate my security lights!
Quick question about step 3! How do I know if I’ve turned off the right power supply before installing the lights? Don’t want to mess this up!
So, I tried to follow the guide, but I couldn’t get the wires connected properly. Any tips on troubleshooting that? The lights just won’t turn on!