

This guide provides a comprehensive, step-by-step approach to installing indoor security cameras, aimed at enhancing home security and monitoring activities within your space. It covers essential aspects such as selecting the right camera for your needs, determining optimal placement for maximum coverage, and the technical steps for installation, including connecting to Wi-Fi and configuring settings. By following these instructions, you can ensure your cameras function effectively, providing peace of mind and a secure environment for your home.

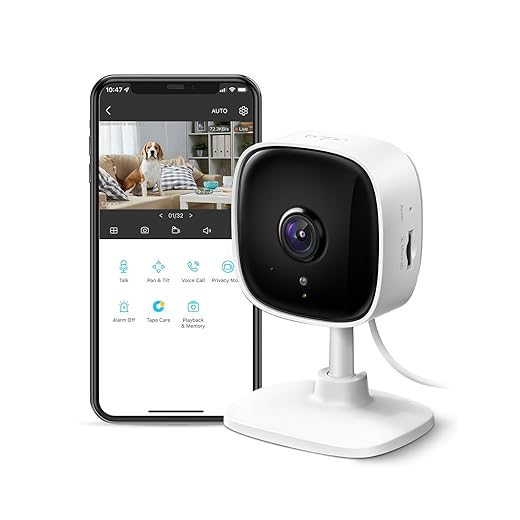


Setting Up the Blink Mini Indoor Security Camera: Initial Thoughts!

Choose the Right Camera
Research indoor security cameras that match your specific needs by comparing features. Prioritize resolution; for example, a camera with 1080p or higher provides clearer images. Evaluate the field of view; a wider angle allows you to monitor larger areas without multiple cameras. Consider night vision capabilities; look for models with infrared technology for clear footage in low light. Examine connectivity options; decide between Wi-Fi for easy installation or wired connections for more stability. Read customer reviews to gain insight into performance and reliability, ensuring the camera you choose has positive feedback.
Gather Necessary Tools and Materials
- Collect all the tools required for installation: grab a drill, screwdriver, mounting brackets, and screws.
- Ensure you have a power source nearby if your devices are wired; otherwise, gather appropriate batteries for wireless cameras.
- Double-check that you have all necessary items on hand before starting the installation process.
- Organize your workspace to make it easier to access tools and materials as you work.
Plan Camera Placement
Identify high-traffic areas and entry points in your space where you want to enhance security. Position cameras to capture clear views of these locations, ensuring they are not obstructed by furniture or decor. Place cameras at a height that makes them difficult to reach, minimizing the risk of tampering or vandalism. Test the camera angles to confirm they cover the desired areas effectively before finalizing your placements.
Install Mounting Brackets
- Gather all necessary tools, including a drill, screws, and a level.
- Align the mounting bracket with the marked spots on the wall or ceiling, ensuring it’s at the recommended height and angle.
- Drill pilot holes for the screws, being careful not to damage any wiring or plumbing behind the surface.
- Securely attach the mounting bracket by inserting the screws and tightening them with the drill, making sure the bracket is firmly in place.
Connect the Camera
Connect the power and video cables for wired cameras by plugging them securely into the corresponding ports. Ensure that the power cable is connected to a power outlet and the video cable is linked to your recording device or monitor. For wireless models, consult the camera’s manual to access the Wi-Fi settings. Choose your network from the list and input the password when prompted, making sure your camera is positioned within range of your Wi-Fi signal for optimal performance.
Configure Camera Settings
Open the mobile app or web interface to access the camera settings. Navigate to the settings menu, usually found in the sidebar or under a gear icon. Enable motion detection by toggling the feature on and adjust the sensitivity slider to suit your needs. Set up alerts by selecting the notification options that work best for you, ensuring you stay informed of any activity. Schedule recording times by choosing start and end times for your camera, and configure cloud storage preferences by selecting your desired storage plan and ensuring it’s linked to your account.
Test the Camera
Test the video feed by accessing the camera’s live stream through the app or software. Adjust the motion detection sensitivity settings and walk in front of the camera to see if it detects your movement accurately. Record a short video clip to evaluate the recording quality, ensuring that the image is clear and the audio is crisp. If any issues arise, revisit the configuration settings for adjustments.
Secure the Camera
- Tuck away all cables neatly behind walls or furniture to prevent accidental disconnection or damage.
- Use cable ties or clips to secure cables along baseboards or under desks, creating a clean and organized appearance.
- Consider using cable sleeves or conduits to further protect cables from tampering and environmental wear.
- Install cable management boxes to hide excess cable lengths and keep everything out of sight, making your setup look professional and tidy.
- For example, use Velcro straps to bundle cables together or a cable management tray underneath your desk to keep cords out of sight and prevent tripping hazards.
Final Thoughts and Tips
In conclusion, installing indoor security cameras is a straightforward process that significantly boosts your home security. By following the steps outlined in this post, you’ll be well-equipped to set up your cameras and keep an eye on what matters most. Just remember to regularly check and maintain your system for optimal performance. With a little effort, you can enjoy peace of mind knowing your home is being monitored. Happy installing!
Essential Equipment List

Maximize Your Setup
Step-by-Step Guide to Setting Up and Utilizing Indoor Security Cameras
- Sure! Here’s a friendly list of tips on how to use indoor security cameras for beginners:
- Choose the Right Location: Start by selecting areas in your home where you want to monitor activity, like entryways, living rooms, or nurseries. Make sure the camera has a clear view and is not obstructed by furniture
- Set Up the Camera: Follow the manufacturer’s instructions to set up the camera. This usually involves connecting it to Wi-Fi and downloading a companion app on your smartphone. Don’t forget to position it at a good height for optimal coverage!
- Adjust Settings: Once your camera is set up, take some time to adjust the settings according to your needs. You can customize alerts, motion sensitivity, and recording schedules to fit your lifestyle
- Test the Feed: After everything is set up, check the live feed to ensure everything is working correctly. Make sure the camera’s angle captures the desired area and that the video quality is clear
- Regularly Review Footage: Make it a habit to review recorded footage from time to time. This helps you stay informed about any unusual activity and ensures your camera is functioning properly
- I hope these tips help you get started! Enjoy the peace of mind that comes with having indoor security cameras!