
How to Set Up Your SimpliSafe Home Security System
In the comprehensive guide “How to Set Up Your SimpliSafe Home Security System,” readers will find a clear, step-by-step process to effectively install and configure their new security system. This post aims to alleviate the anxiety and confusion often associated with setting up home security devices by breaking down the installation into manageable steps. From unboxing the equipment to connecting sensors and configuring settings, this guide ensures that even those with minimal technical expertise can secure their home efficiently. By following these instructions, readers will gain the confidence and knowledge needed to enhance their home’s security, ultimately addressing their concerns about safety and protection.


Effortless Setup and Installation of SimpliSafe Home Security – An Exceptional Security Solution
Unbox Your SimpliSafe System
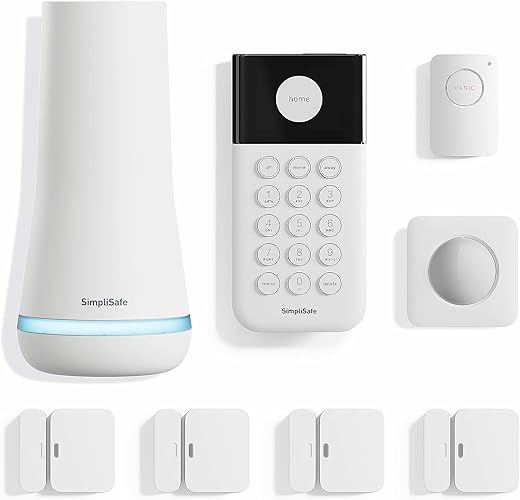
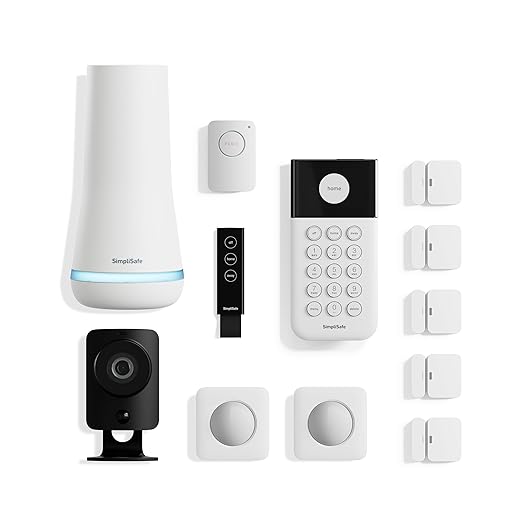
Carefully open the package, ensuring you don’t damage any components inside. Gently lift the lid and remove any protective padding that may be covering the items. Take out all components of your SimpliSafe system, including the base station, keypad, sensors, and any additional accessories. Lay everything out on a clean, flat surface to keep track of each item as you go.
Check the included checklist to confirm that all necessary items are present. Look for the base station, which is typically the largest piece, followed by the keypad and various sensors, such as entry sensors and motion detectors. If your package includes additional accessories like cameras or key fobs, ensure these are also accounted for. Take a moment to familiarize yourself with each component, as this will make the setup process smoother later on.
Choose Locations for Your Devices
- Choose a central location for the base station. Ensure it’s plugged into a power outlet and has a strong Wi-Fi signal. This central positioning allows for better communication with all your devices.
- Identify ideal spots for sensors. Place door sensors on all exterior doors to detect any unauthorized entry. Install window sensors on accessible windows, ensuring they can detect any opening. For hallways, position motion sensors to monitor movement throughout your home.
- Ensure sensors are at the correct height. Mount them at about 5 to 7 feet off the ground for optimal performance.
- Avoid placing sensors near obstructions. Keep them clear of furniture, curtains, or anything else that might block their line of sight or interfere with their function.
- Test each placement. After installation, walk through the areas to ensure that the sensors are detecting motion and that the base station is communicating effectively with all devices.
Install the Base Station
Place the base station in a central location within your home or office to ensure optimal coverage. Avoid areas with excessive obstructions such as walls or large furniture that could interfere with the signal. Connect the base station to a power source by plugging it into a nearby outlet. Make sure the power cable is secured and not a tripping hazard.
Ensure the base station is within range of your Wi-Fi network. Check for a strong signal by observing the LED indicator on the front of the base station. Wait for the LED to light up; it should indicate that the device is powered and connected properly. If the LED does not light up or shows a different color, adjust the location of the base station or verify your Wi-Fi connection to troubleshoot any issues.
Set Up the Keypad
Mount the keypad on the wall or position it on a flat surface. If opting for wall mounting, choose a location near your main entry points for easy access. Clean the area where you will attach the keypad to ensure the adhesive sticks properly. Use the included adhesive for a quick installation, or secure it with screws for a more permanent solution. If you’re using screws, drill pilot holes first to make the process smoother.
Ensure the keypad is at a comfortable height, typically around 4 to 5 feet from the ground, so it’s easily reachable for everyone. Step back and check that the keypad is visible and accessible without any obstructions. Make any necessary adjustments before finalizing the installation. If placing it on a flat surface, choose a stable area where it won’t be easily knocked over or moved.
Install Door and Window Sensors
- Choose an appropriate location for each sensor. For door sensors, place them on the upper corner of the door frame. For window sensors, attach them to the upper part of the window frame.
- Clean the surfaces thoroughly to ensure proper adhesion. Use rubbing alcohol or a suitable cleaner to remove dirt and dust.
- Peel off the adhesive backing from the sensor. Press firmly against the surface, ensuring the sensor is straight and secure. If you prefer using screws, drill small holes as needed and secure the sensors with screws provided in the installation kit.
- Align the sensors properly. Make sure the magnet part of the sensor is positioned closely to the main sensor unit when the door or window is closed. This alignment is crucial for the sensors to function effectively.
- Check the distance from the base station. Ensure that the sensors are within the recommended range for optimal performance. If necessary, adjust the placement of the sensors or the base station accordingly.
- Test the sensors after installation. Open and close the doors and windows to confirm that the sensors are detecting movement and communicating with the base station as expected.
Add Motion Sensors
Position motion sensors in strategic locations to maximize their effectiveness. Focus on areas where movement is likely to occur, such as corners of rooms or directly facing entryways. Ensure that the sensors have an unobstructed view of the space you want to monitor. Avoid placing them near sources of heat, like radiators or air conditioning units, as these can trigger false alarms.
Follow the installation instructions provided with your sensors for securing them properly. Use the necessary tools, like screws or adhesive pads, to ensure they are firmly attached to the wall or surface. Adjust the angle of the sensors if needed, so they cover the desired area effectively. Once installed, test the sensors to confirm they detect movement as expected before considering the setup complete.
Connect and Configure Your System
Connect your system to your Wi-Fi network by following the instructions displayed on the keypad. Here’s how you can do this smoothly:
- Navigate to the Wi-Fi settings on the keypad. You might see options like “Network Setup” or “Wi-Fi.”
- Select your Wi-Fi network from the list provided. Ensure you choose the correct one—look for your home network name.
- Enter your Wi-Fi password using the keypad. Make sure to input it accurately; it’s case-sensitive!
Once your system is connected, download the SimpliSafe app on your smartphone from the App Store or Google Play. This app will allow you to complete the setup and customize your security preferences easily.
- Log in or create an account on the app. If you’re a new user, follow the prompts to set up your profile.
- Connect your system in the app, ensuring all devices are recognized.
- Customize your security settings to suit your needs. For example, set up notifications for when your system is armed or disarmed.
By following these steps, you’ll be well on your way to having your security system fully operational and tailored to your preferences!
Final Steps for Success
In conclusion, setting up your SimpliSafe Home Security System is a straightforward process that can greatly enhance your home’s safety. By following the steps outlined in this guide, you’re now equipped to monitor your home with confidence. Don’t forget to regularly test your system and explore the app’s features for seamless management. Stay safe and enjoy the peace of mind that comes with knowing your home is protected!
Essential Equipment List
Maximize Your Security
Step-by-Step Guide to Setting Up and Maximizing Your SimpliSafe System
- Set Up Your Base Station: Start by placing the base station in a central location in your home. Plug it into a power outlet and connect it to your Wi-Fi network for full functionality
- Install the Sensors: Attach the entry and motion sensors where needed. For entry sensors, place them on doors and windows, while motion sensors should be positioned in high-traffic areas. Just peel off the adhesive backing and stick them on!
- Download the SimpliSafe App: Get the SimpliSafe app on your smartphone. This will allow you to monitor your system, receive alerts, and control settings from anywhere
- Customize Your Settings: Open the app and customize your security settings. You can set up notifications, create security schedules, and even add additional devices if necessary
- Test the System: After everything is set up, run a quick test to ensure all sensors are working correctly. Activate the system and check if you receive alerts for each sensor when triggered
- I hope this helps you get started with your SimpliSafe system! If you have any questions, feel free to ask
Also Read: Understanding Outdoor Security Light Ratings


About the Author: Oliver James


news via inbox
Stay updated with the latest tips and offers. Subscribe to our newsletter today!




Hi there! Sorry to hear you’re having trouble with the door sensors. Make sure the sensors are within range of the base station and check the battery levels. If they’re good, try resetting the sensors by pressing the button on the back. That usually does the trick! Let us know how it goes!
So, I was reading through the guide and decided to customize it a bit. Instead of putting the window sensors on all the windows, I only put them on the ones that are less visible from the street. I feel like it gives me a little more security while not drawing too much attention. Just a thought for anyone considering their setup!
That’s a clever approach! Strategically placing sensors can indeed make a difference in your home security. Balancing visibility and safety is key. Thanks for sharing your unique setup; it might inspire others to think outside the box!
I just wanted to share that I placed my base station in the corner of my living room, and it works perfectly! I also added extra motion sensors in the hallway for that added peace of mind. Really helps when I have my kids running around! Just a little extra layer of security.
Great tip! Placing the base station in a central location can really enhance the system’s effectiveness. Extra motion sensors in high-traffic areas are definitely a smart move, especially with kids around! Thanks for sharing your experience!
Hey, I tried setting up the door sensors, but they just wouldn’t sync with the base station! I followed the steps, but I keep getting a ‘failed to connect’ message. Anyone else faced this? Any troubleshooting tips would be super helpful!
I just installed my SimpliSafe system last week, and honestly, it feels like a game changer! Having the motion sensors set up in my living room makes me feel so much safer, especially when I’m home alone. It’s super easy to monitor everything from my phone too!
That’s awesome to hear! We’re so glad you’re feeling more secure with your SimpliSafe system. The mobile app is definitely a game changer for monitoring. If you have any other tips or experiences, feel free to share!